-
Product Categories
-
Featured Products
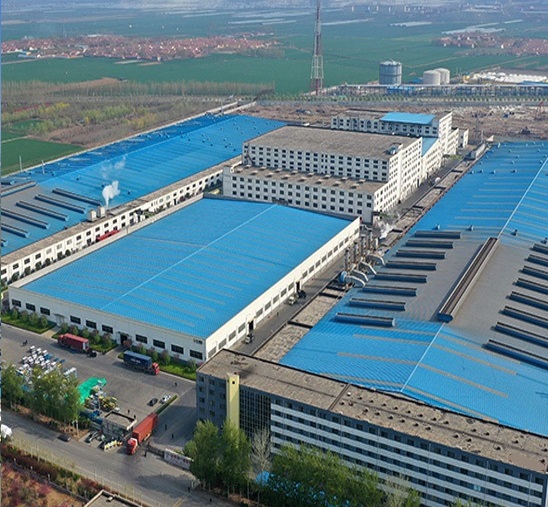
SUNGDA FACTORY AREA
Currently the most complete conveyor belt fault solutions
1.Startup and shutdown
Conveyor should generally be started under no-load conditions. When a conveyor line with several belt conveyors is installed, a starter that can be locked should be used to start and stop in a certain order through the centralized control room. In addition, in order to prevent unexpected accidents, each conveyor should also be equipped with an emergency start or stop button, which can stop any one individually. In order to prevent the conveyor belt from being torn longitudinally for some reason, when the conveyor length exceeds 300m, a stop button should be installed along the entire length of the conveyor at a certain distance (such as 25-30m).
2.the maintenance of belt conveyor
In order to ensure the reliable operation of the belt conveyor, the most important thing is to find and eliminate possible failures in time. To this end, the operator must observe the working condition of the conveyor at any time. It is important that mechanical workers regularly inspect and inspect any conditions or components that require attention. For example, a roller only does not seem to be very important, but a high-speed conveyor belt that transports worn materials may quickly wear through its shell, and a blade appears. This blade may seriously damage an expensive conveyor belt. Trained workers or experienced staff can detect impending accidents in time and prevent them from happening.
Belt conveyor belts account for a considerable proportion of the entire conveyor cost. In order to reduce the cost of replacing and repairing conveyor belts, we must attach importance to training operators and maintenance personnel on the operation and maintenance knowledge of conveyor belts. Table l-40 lists a large number of reasons and solutions for the operation problems of the conveyor belt.
The cause of belt conveyor failure and its elimination
Normal obstacle content
Reason (in order of possible occurrence)
Conveyor belt deflects at the tail conveyor pulley 7, 15, 14, 17, 21
The whole conveyor belt runs off the whole line 26, 17, 15, 21, 4, 16
Part of the conveyor belt deflects across the line 2, 11, 1, 1.
Conveyor belt deflects at the drive conveyor pulley 15, 22, 21, 16
The full length of the conveyor belt runs to the side at some specific rollers 15, 16, 21,
Conveyor belt skid 19, 7, 21, 14, 22
Starting skid of conveyor belt 19, 7, 22, 10
Conveyor belt stretched too large 13,10,21,6,9,8
The belt is cracked at or behind the buckle; the buckle is loosened 2, 23, 13, 22, 20, 10
Vulcanized joint peeling 13, 23, 10, 20, 2, 9
Conveyor belt excessive wear, including tearing, breaking and tearing 12, 25, 17, 21, 8, 5
Undercovering rubber excessive wear 21, 14, 5, 19, 20, 22,
Excessive wear and tear of edges 26, 4, 17, 8, 1, 21
The cover rubber partially bulges or streaks 8.
Conveyor belt becomes hard or crack 8,23,22,18
Covering rubber shows fine cracks or becomes brittle8, 18
Longitudinal cracks in the upper cover rubber 27, 14, 21, 12
Longitudinal cracks under the cover rubber 14, 21, 22,
Interlayer peeling 13, 23, 11, 8, 3
1—Conveyor belt bending—Avoid rolling the conveyor belt into a tower or storing it in a humid place. A new conveyor belt should be straight after being connected, otherwise it should be replaced.
2—The conveyor belt is spliced incorrectly or the clip is improper—use the correct clip, and tighten it again after a short period of operation. If the splicing is not correct, remove the joint of the conveyor belt and make a new joint. Establish a regular inspection system.
3—Conveyor belt speed is too fast —- Reduce conveyor belt speed.
4—The conveyor belt is twisted on one side—connect to a new conveyor belt. If the conveyor belt is inserted incorrectly or is not a new belt, the twisted part should be removed and a new section of conveyor belt should be inserted.
5—The strip buffer lining is missing or improper-when it cannot be used, install a conveyor belt with an appropriate strip buffer lining.
6—The counterweight is too heavy—Recalculate the required weight and adjust the counterweight accordingly to reduce the string tension to the slippage point, and then tighten it slightly.
7—The counterweight is too light—Recalculate the required weight and adjust the counterweight or screw tensioner accordingly.
8—Damage due to wear, acid, chemicals, heat, mildew, oil—Using conveyor belts for special conditions. When the abrasive material is worn or rubbed into the fabric layer, use cold repair or permanent repair. Use metal clips or stepped vulcanized joints instead. Close the conveyor belt line to prevent rain, snow or the sun, and do not lubricate the idlers excessively.
9—The transmission speed of the double rollers is different—make necessary adjustments.
10—Insufficient transmission capacity of the conveyor belt—recalculate the maximum tension of the conveyor belt and select the correct conveyor belt. If the system is extended too long, consider using a two-stage system with a running station. If the stiffness of the belt core is poor enough to support the load and cannot work normally, the carousel with appropriate flexibility should be replaced.
11—The edge of the conveyor belt is worn or broken—Repair the edge of the conveyor belt, remove the badly worn or irregular parts and splice a new edge of the conveyor belt.
12—The impact of the material on the conveyor belt or at the clip is too large—use a properly designed chute and protective plate; use a vulcanized joint: install a impact roller; add fine material where possible. In the place where the material is clamped in the lower part of the material guide groove, adjust the material guide technology to the minimum gap or install elastic rollers to keep the conveyor belt close to the material guide groove.
13—Excessive tension—Recalculate and adjust the tension. Use vulcanized joints within the recommended range.
14—conveyor roller does not rotate—Turn the conveyor roller, add lubricating oil, improve maintenance ( Do not add excessive lubricating oil).
15—The roller is skewed to the center line of the conveyor—re-alignment. For safety, limit switches should be installed.
16—Improper roller setting—Reset the roller, or insert supplementary rollers at a certain distance to support the conveyor belt.
17—Inappropriate feeding, sprinkling material—feed at the center of the conveyor belt according to the direction and speed of the conveyor belt. Use feeder, chute and guide trough to control material flow.
18—Inappropriate storage or loading and unloading—refer to the manufacturer’s instructions on storage and loading and unloading.
19—Insufficient friction between the conveyor belt and the surface of conveyor pulley—increasing the wrap angle with a surface-increasing pulley, driving the conveyor pulley to add a protective surface, such as using a grooved protective surface to roll under wet conditions. For safety, install the appropriate cleaning device, see item 7 above.
20—Materials enter between the conveyor belt and the conveyor pulley—use appropriate material guide troughs to remove deposits; improve maintenance.
21—Material fouling—remove deposits; install cleaning device, scraper and inverted “v” shaped overflow plate. Improve care work.
22—Conveyor pulley surface wear—Replace worn conveyor pulley rubber lagging cover. In wet conditions. Use grooved cover. Tighten loose or protruding screws.
23—The conveyor pulley is too small—Use a larger diameter conveyor pulley.
24—The radius of the vertical convex arc curve is too small—rearrange the conveyor rollers in the vertical direction to increase the vertical curve radius, thereby preventing excessive tension on the edge of the conveyor belt.
25—The relative feeding speed is too high or too low—adjust the chute or correct the conveyor belt speed. And consider using impact rollers.
26—Feeding deflection——Feed according to the running direction of the conveyor belt at the center of the conveyor belt.
27—The guide trough is improperly set—When installing the guide trough, make sure that they do not wear the conveyor belt.
Before commissioning a conveyor, the conveyor and its components should be checked in detail. This method is recommended. Only after a precise inspection can it be operated. In the process of inspection and commissioning, the alignment of all mechanical components and the alignment of the conveyor belt on the conveyor rollers in the heavy and empty sections should be checked. Please refer to the conveyor belt and roller centering section of the conveyor installation.
Make sure that there are no building materials, tools or protruding parts that may scratch, tear or cut the conveyor belt when starting up. The installation of chute and feed channel shall ensure that the conveyor belt is not worn. The rubber side plates on the guide trough should be adjusted so that they only gently touch the surface of the conveyor belt. Check the scraper cleaner of the conveyor belt and make final adjustments if necessary.
Conveyor belt local damage can be repaired by vulcanization method. For example, because the vulcanization repair time is too long, or the local damage area is not large, you can temporarily put a card in the crack to repair.
If the conveyor belt needs to be replaced. You can use the “peeling method” (see Figure 1-41). This method is to use three rivets with a diameter of 8mm to rivet one end of the new conveyor belt on the upper section of the old belt behind the tail conveyor pulley. Start the head and use the old conveyor belt to pull the new belt upward. When the new belt has been detoured After a week and passing the tail conveyor pulley, the new belt is separated from the old belt after stopping (at this time, the empty section of the old belt is cut and turned over in turn).
3. Installation of belt conveyor
The installation of belt conveyor is generally carried out in the following stages.
1) The installation of the frame for installing the belt conveyor starts from the head frame, then installs the intermediate frames in sequence, and finally installs the tail frame.
Before installing the rack, the center line must be drawn over the entire length of the conveyor. Keeping the center line of the conveyor in a straight line is an important condition for the normal operation of the conveyor belt. Therefore, when installing each section of the rack, you must Align with the center line, and at the same time, we must also level the rack. The allowable error of the rack to the center line is ±0.1mm per meter. However, the error to the center of the rack over the entire length of the conveyor must not exceed 35mm.
When all the single sections are installed and correctly identified, the single sections can be connected.
2) Install the driver system
When installing the drive device, care must be taken to make the transmission shaft of the belt conveyor perpendicular to the centerline of the belt conveyor, so that the center of the width of the drive conveyor pulley coincides with the centerline of the conveyor, and the axis of the reducer is parallel to the transmission axis. At the same time, all shafts and rollers should be leveled. The horizontal error of the shaft is allowed in the range of 0.5-1.5mm according to the width of the conveyor.
At the same time as installing the driving device, you can install a tensioning device such as a tail wheel. The axis of the conveyor pulley of the tensioning device should be perpendicular to the center line of the belt conveyor.
3) Install roller
After the installation of the frame, the transmission device and the tensioning device, the roller frame of the upper and lower rollers can be installed to make the conveyor belt have a curved arc that slowly changes direction. The distance between the roller frames of the turning section is 1 of the normal roller frame spacing 1/2~1/3. After the idler is installed, it should be flexible and light.
4) The final identification of the belt conveyor
In order to ensure that the conveyor belt always runs on the center line of the conveyor pulley and roller, the following requirements must be met when installing the roller, frame and conveyor pulley:
(1) All conveyor rollers must be lined up, parallel to each other, and kept horizontally horizontal.
(2) All the conveyor pulleys are lined up and parallel to each other.
(3) The supporting structural frame must be straight and horizontal.
For this reason, after the installation of the driving conveyor pulley and the roller frame, the center line and level of the conveyor should be finally corrected. Then fix the rack to the foundation or floor.
After the belt conveyor is fixed, the feeding and unloading devices can be installed.
5) Hanging conveyor belt
When hanging the conveyor belt, first lay the conveyor belt on the conveyor pully and roller, after surround the drive roller, and then lay it on the conveyor rollers. Hanging belt can use 0.5-1.5t hand winch.
When connecting the tensioning strip, the roller of the tensioning device should be moved to the limit position, and the pulley and the spiral tensioning device should be moved toward the transmission device; and the vertical picking device should move the roller to the top. Before tightening the conveyor belt, the reducer and motor should be installed, and the inclined conveyor must be equipped with a braking device.
After the installation of the belt conveyor, a no-load test is required. During test, pay attention to the deviation of the conveyor belt during operation, the operating temperature of the driving part, the activity of the roller during operation, the tightness of the contact between the cleaning device and the guide plate and the surface of the conveyor belt, etc. Carry out necessary adjustments, and test under load after all components are working well. If a screw-type tensioning device is used, the tightness must be adjusted again when the test is operated under load.

Tags: conveyor line fault,Rubber conveyor belt
Related Products
-

What are the Basic Indicators that Determine the Quality of Conveyor Belts?
No. -
What Are the Tensile Strength and Elongation in Rubber Conveyor Belts?
No. -

What’s “kg/cm²” in Conveyor Belt and How Convert it into other Units?
No. -
What is the difference between PSI and Mpa in conveyor belts and how to convert them to each other?
No. -
How to conduct conveyor belt troughing test
No. -

The Most Comprehensive National and Organizational Conveyor Belt Testing Standards
No. -

What are the chemical properties of various rubber components in rubber conveyor belts?
No. -

How to reasonably design long-distance conveyor lines
No. -

The 4 most critical tips for choosing the right rubber conveyor belt
No. -
How to increase the service life of rubber conveyor belts
No.